Unveiling the Color Steel Tile Roof Support System A Comprehensive Analysis from Structure to Application

In the realm of modern architecture, roof rack solar panel for color steel tiles have emerged as a popular choice for the roofs of numerous industrial plants, warehouses, and residential buildings, owing to their lightweight nature, aesthetic appeal, and construction convenience.

The color steel tile roof support system, which underpins this “steel exterior,” acts as an invisible guardian of the building’s roof, silently fulfilling crucial roles such as providing stability, bearing loads, and resisting wind forces.

Today, let’s take an in-depth look at this indispensable component of building structures.​


I. Composition and Classification of the Color Steel Tile Roof Support System​

The color steel tile roof support system of  the mounting solar panels is not a single component but an organic whole in which multiple parts work in harmony.

Its core components include main supports, secondary supports, connectors, and fasteners.

The main supports, often made of high-strength steel, serve as the “backbone” of the entire system, primarily responsible for bearing the vertical and horizontal loads of the roof. Secondary supports, similar to “ribs,” cooperate with the main supports to further refine the load transfer path and provide a stable installation surface for the color steel tiles.

Despite their small size, connectors and fasteners play a pivotal “binding” role, firmly connecting each support component to ensure the integrity and stability of the system.​


Based on different application scenarios and design requirements, the color steel tile roof support system of the flat roof pv panels can be classified in various ways.

From the perspective of structural forms, it can be divided into the planar support system and the spatial truss support system.

The planar support system, with its relatively simple structure, is suitable for roofs with a small slope and low load requirements.

In contrast, the spatial truss support system, thanks to its three-dimensional structure, offers greater load-bearing capacity and stability, making it commonly used in buildings with high structural requirements, such as large industrial plants and stadiums.

Additionally, according to different installation methods of the mounting solar panels on roof , it can be categorized into the welded support system and the prefabricated support system.

The welded support system features high connection strength but involves a relatively complex construction process and strict requirements for welding techniques.

The prefabricated support system, on the other hand, has gradually become the market mainstream due to its modular design and easy installation, significantly shortening the construction period and reducing labor costs.​


How to Install a Solar Fence System Step-by-Step Guide for Beginners

The use of a solar fence system has been one of the most effective means of ensuring security to property and will save a lot of electricity. Solar fences are an intelligent and eco-friendly solution, whether they are used in farms, residential areas or industrial areas.

But if you are new and you do not know where to begin do not worry. This step adieu will take you through the whole process of installation step by step, starting with the preparation down to the setup. And yes, you do not have to be tech savvy to do it right.

What Is a Solar Fence?

A solar fence is also an electric fence which is powered by solar. It is made of solar panels, fencing wires, an energizer and grounding rods. The usage of these fences is very common in agricultural farms, military areas, and residential properties to stop any intrusion.

These systems are also suitable in areas with poor sources of power mainly in remote locations due to the source of power which is solar.

Why Choose a Solar Fence?

It is better to understand why a solar fence is a preferred choice to get into the installation:

  • Environmental: Exploits renewable source energy (sun).
  • Low Maintenance: Less parts, less trouble.
  • Cost-Effective: The costs of running the system is cheap once installed.
  • Can be relied upon: Performs even at the off-grid sites.
  • Modifiable: It can be modified according to the various terrains and its uses.

Firms such as Corigy have made the mounting part very easy, especially since it provides trustworthy vertical mounting brackets to effectively install solar fencing structures. These also are easy to align and they perform well hence the installation is made very easy.

Tools and Materials You Will Need

Before beginning, make sure you have the following:

  • Solar panel (preferably bifacial)
  • Fence energizer
  • Battery (12V or more)
  • Fencing wire (steel or polywire)
  • Fence posts (metal or plastic)
  • Grounding rod and clamps
  • Warning signage (as per local regulations)
  • Wire tighteners
  • Multimeter (to test voltage)
  • Corigy 's vertical mounting bracket (if you are using bifacial panels)

Step 1: Choose the Location

Start by selecting a suitable site for installation. Look for:

  • Best Sunlight Exposure: An all-day exposure to the sun should be given to the solar panel.
  • Flat Ground or Mellow Slope: More comfortable in the matters of wiring and the panel attachment.
  • Security and Visibility: To achieve good security, it is advisable not to locate in shaded and dark places.

This location will become the control hub for your solar fence system.

Step 2: Plan the Layout

Sketch the fence route before installing the posts. Decide:

  • Total length of fencing required
  • Number of corners and turns
  • Placement of the solar panel and energizer

Make sure the layout accounts for gates or entry points.

Pro Tip: Always keep the energizer in the center of the fence route for balanced energy distribution.

Step 3: Install Fence Posts

Using a post driver or digging tool, fix the fence posts along the marked path.

  • Maintain consistent spacing (8–12 feet between each post)
  • For corners, use stronger or wooden posts
  • Make sure all posts are vertically aligned

Once the posts are in place, you're ready to string the wires.

Step 4: Mount the Solar Panel

This is where things can be simplified using a bifacial solar panel with vertical mounting brackets. Corigy offers a durable solar fence vertical mounting solution that ensures firm placement of your panels with minimal tools.

The process is straightforward:

  • Fix the vertical mounting bracket to the fence post
  • Attach the bifacial panel to the bracket
  • Angle it in the correct angle (about 30 to 45).

Make sure the panel is turned as per the sun and that it is tightly connected so that it does not wobble on shaking wind.

Step 5: Connect the Battery and Energizer

When the panel is secured, what you need to connect it to next is a deep-cycle battery, and this is where solar energy is stored to be used at night or during cloudy days.

Steps:

  1. Hook up the two positive and negative cables of the solar panel with the battery.
  2. Place the energizer near the battery.
  3. Connect the energizer to the battery.
  4. Connect the energizer output to the fencing wire.

To prevent the waste of energy, use quality connectors. It is also best to protect the battery and energizer with rain and direct sun.

Step 6: Lay the Fencing Wire

Now comes the physical fence. Begin to coil the wire around the post starting in one corner and continuing in a round way.

  • Use wire tighteners to keep tension even
  • Add insulators to prevent wire contact with posts
  • Place warning signs along the perimeter if required by law

Always leave some slack at the end so you can connect it to the energizer later.

Step 7: Ground the System

Grounding ensures the fence delivers an effective jolt when touched. It's crucial for the system's performance.

Steps:

  1. Drive at least one grounding rod 4–6 feet deep into moist soil.
  2. Connect it to the energizer's ground terminal using a ground clamp.
  3. If the soil is dry, install multiple rods spaced 10 feet apart.

A poorly grounded system will result in weak shocks or system failure.

Step 8: Final Wiring and Connection

Now, connect the fencing wire to the energizer's hot terminal. Make sure:

  • The connection is tight
  • No wire is in contact with vegetation (it reduces voltage)
  • The voltage is tested using a multimeter

A properly working solar fence should read around 3,000–5,000 volts on a meter.

Step 9: Testing the System

Walk around the perimeter and use a fence tester to check voltage at multiple points.

  • Check for weak spots or shorts
  • Tighten any loose wires
  • Make adjustments where needed

Make sure the system is active both day and night. The battery should be charged and the energizer working consistently.

Step 10: Maintenance Tips

Solar fences need very little upkeep, but regular checks will ensure peak performance:

  • Clean solar panels monthly to remove dust
  • Trim vegetation near the fence
  • Check voltage levels weekly
  • Inspect for rust or corrosion on wires and posts

Corigy 's mounting brackets are corrosion-resistant, which helps reduce long-term maintenance.

Common Mistakes to Avoid

Even though the installation is simple, there are mistakes beginners often make:

  • Installing the panel in a shaded area
  • Using low-quality fencing wires
  • Skipping the grounding system
  • Letting vegetation touch the live wires
  • Overlooking the panel tilt and alignment

Avoiding these can save time and extend the life of your fence system.

Final Thoughts

It is not necessary to make installing a solar fence complicated. When done properly with appropriate tools and recommendations it can be a painless procedure that is cost effective and provides good security. By selecting dependable parts such as vertical mounting brackets made by Corigy you will create a system that will out last and operate reliably under all conditions.

Solar fence is a long-term and cost-effective investment, whether you are setting up the system as a new one or merely upgrading it.

So take the leap, go solar—and build your fence the smart way.


Solar Panel Parking Lots Boost Energy & Save Space

Parking lots have always served useful purposes, but soon these will go another notch by being better sources of energy. As sustainability becomes a bigger focus across industries, solar panel parking lots are emerging as a smart, space-saving way to reduce costs and support clean energy goals.

Such systems (for the professionals of the construction, planning, and commercial real estate sectors) give an opportunity to achieve the energy objectives without compromising functionality. As a matter of fact, they perform more using less—creating electricity along with enhancing daily usability.


What Are Solar Panel Parking Lots, and Why Are They Important?

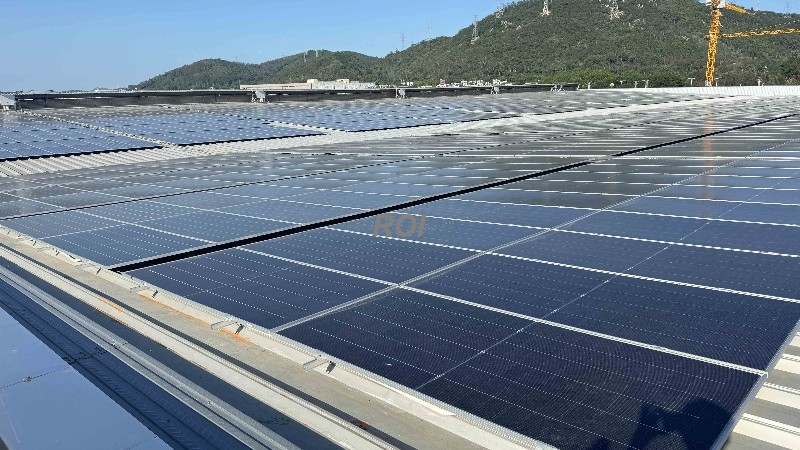
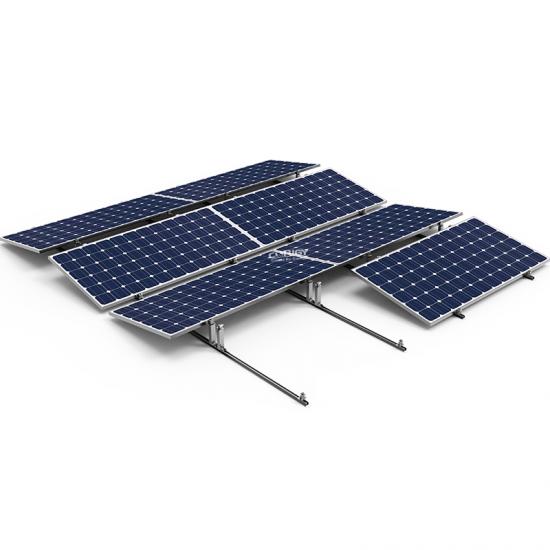
A solar panel parking lot is simply what is implied by having a regular parking lot and fitting it with solar panels in the air. To make these panels, they are mounted on high frames made out of steel or aluminium and, in most cases, cantilevered to shade vehicles and harness clean energy in the form of sunlight simultaneously.

They are space efficient, especially in the urban setup where land area is scarce. They can convert the current infrastructure owned by property owners to become energy-generating systems instead of erecting massive and distant solar farms.

Key Benefits of Solar Panel Parking Lots

Dual-purpose design

Such systems have two functions. They help cars to be cooler since they create a shade, and they also make electricity during the day in a silent manner. Those twofold advantages tend to turn them into perfect locations for shopping centres, office parks, or campuses.

Low energy expenses

The electric-generated solar power can be consumed at the same place directly as light or air conditioning or alternatively offset a section of the power demand of a building. That makes a proper saving on utility bills in the long run.

Environmental impact

Transformation to solar involves an implication of the reduction of fossil fuels. By using solar panel parking lots, companies can reduce their carbon footprint and take meaningful steps toward climate commitments.

Enhanced user experience

Nobody enjoys getting into a car that’s been baking in the sun. With covered parking, these systems improve comfort for drivers while also protecting vehicles from weather damage.

Incentives and tax credits

The solar projects enjoy tax breaks or rebates from the government in most areas. To the business, it is an even greater advantage to the initial investment project in the long-term sense.

Supporting ESG and Corporate Sustainability

Environmental goals aren’t just about good PR anymore. Investors, regulators, and even customers now expect companies to take real action. That’s why solar investments are becoming a go-to strategy for meeting ESG (Environmental, Social, Governance) goals.

Solar panel parking lots are highly visible and highly effective. These things are symbols of improvement, accountability, and resourcefulness, something worthwhile in the contemporary business world.

Where Are Solar Panel Parking Lots Being Used?

These systems are incredibly versatile. We’re seeing them in:

  • Corporate campuses, where they help reduce energy bills and improve the employee experience
  • Retail spaces, where shoppers enjoy shaded parking while stores benefit from clean power
  • Hospitals, where consistent energy supply is critical
  • University campuses, where solar parking becomes both a power source and a teaching tool
  • Government properties, where renewable energy mandates are driving infrastructure upgrades

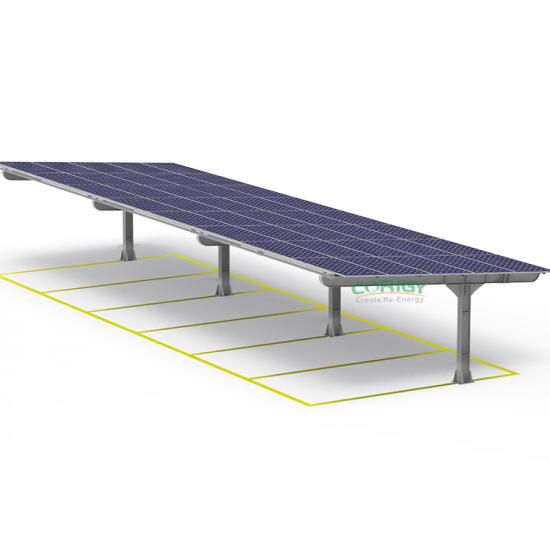
Corigy has become a trusted name in this space, offering customisable systems like their six-vehicle cantilever structure. It’s a strong, efficient, and easy-to-install solution for a wide range of facilities.

Interventions to the Challenges

Like any smart investment, solar panel parking lots come with considerations:

  1. The first question is the cost upfront. Although such systems are not inexpensive, their long-term savings and the incentives inherent therein tend to level the balance within a few years.
  2. Readiness of sites is an issue, too. Some places might need to test their soil or load check prior to installation.
  3. Zoning and permits may be time-consuming, particularly in areas that have stringent building regulations. This is why project partners will need to be experienced.
  4. It does not require much maintenance, nevertheless. Panels must be clean and checked regularly in order to give optimised performance.
  5. Most of these worries are quite easy to address with a proper team and planning in place; after all, the payoff is long-term.

Why Cities Are Turning to Solar Panel Parking Lots

Urban areas are under pressure to meet clean energy targets, reduce emissions, and make smarter use of limited space. Solar panel parking lots tick all those boxes.

They help cities:

  • Generate power without using new land
  • Offer shade and shelter in high-traffic zones
  • Prepare for EV adoption with integrated charging stations
  • Reduce the urban heat island effect
  • Align with clean energy policies and mandates

It’s no surprise that more municipalities are making solar parking structures a part of their planning.

Corigy’s Contribution to Smart Solar Infrastructure

Corigy’s engineering team has spent years refining their solar mounting systems. The result? Durable, high-performance parking structures that fit a variety of sites.

Their six-car solar parking solution is popular among schools, commercial lots, and government projects. It’s built to resist corrosion, handle heavy weather loads, and install with minimal site disruption.

For projects that require performance and reliability, it’s a strong choice.

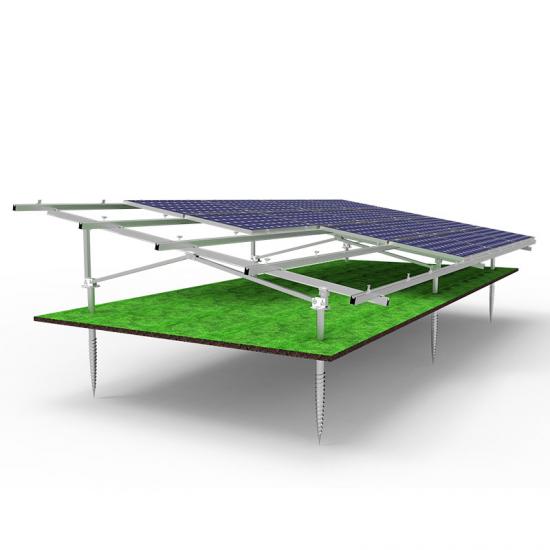
Comparing Solar Panel Parking Lots to Ground-Mounted Systems

There’s often a choice to be made between rooftop, ground-mounted, or parking lot solar. Here’s why many professionals are choosing the last option:

Feature

Solar Panel Parking Lots

Ground-Mounted Systems

Space use

Makes use of existing parking

Needs dedicated land

Functionality

Shade + energy

Energy only

Installation complexity

Moderate

Depends on site size

Aesthetic appeal

Modern, blends into property

May require fencing/landscaping

EV-readiness

Easy to integrate

Requires separate planning

In cities or developed areas, solar parking lots are often the most practical path forward.

Looking Ahead: The Future of Solar Panel Parking Lots

Parking lots are long, underexploited parking places. They are now becoming important components of the clean energy transition. With increased deployment of electric vehicles on roads and increased need of sustainable infrastructure, the systems are bound to be more worthwhile.

Solar panel parking lots don’t just check a box. They prepare organisations for a future where power is clean, local, and smart.

By choosing adaptable systems now—like those Corigy provides—businesses and governments can reduce risk, cut energy costs, and meet long-term goals.

Conclusion

Solar panel parking lots offer more than energy—they offer a smarter way to build. Businesses, governments, and institutions are reaping the real value by converting parking spaces into clean power sources.

The best part? You don’t have to start from scratch. With trusted systems from companies like Corigy, the shift to solar is within reach—economically, technically, and operationally.

Now is the time to power up your parking.

FAQs

Q1. Why don't we install solar panels in the parking lots?

Ans. Traditionally, a lot of people did not want to use them either because they were expensive or could not be installed. However, with enhanced engineering and great economic incentives, they have become a viable alternative to many properties.

Q2. Which company can have solar panels on one of their parking lots?

Ans. Walmart, Apple, and Google are some of the firms that have incorporated the use of solar carports to generate energy and cut costs on energy. It belongs to a greater trend in favour of clean infrastructure.

Q3. What are the solar parking lots?

Ans. They are parking spaces that have solar panels mounted overhead. The structures offer shaded parking areas as well as renewable energy, and this is done in a single system.

Q4. Which company can have solar panels on one of their parking lots?

Ans. A number of Fortune 500 companies, universities, and government institutions have ventured into the use of solar parking. It has been an effective framework for integrating sustainability and daily operations.


What is a Solar Canopy?

A solar canopy is a raised structure that supports solar panels, usually installed over open areas like parking spaces. In comparison to the rooftop solar setups, this setup will generate shaded spaces down the ground, and clean energy above. It converts virgin land to energy-generating property.

There is increasing demand in the need of both efficient and sustainable infrastructure. That's why many businesses are turning to solar panel parking lots —a strategic way to achieve clean energy goals without sacrificing space.

Why Use a Solar Canopy?

Installing a solar canopy is a practical step toward energy independence. It serves two purposes at once: creating power and shelter offering. This dual functionality makes it an ideal solution for commercial, industrial, and municipal properties.

Key Benefits:

  • Maximizes energy production without taking up extra space
  • Keeps vehicles protected from UV, rain, and snow
  • Reduces heat absorption in parking areas
  • Helps organizations meet renewable energy targets

These canopies are often seen in solar panel parking lots , where they help cut energy costs and improve site utility.


The Rise of Solar Panel Parking Lots

Solar panel parking lots are becoming essential in the shift toward green infrastructure. They offer an eco-friendly use of space, turning standard parking lots into power stations.

Systems like these are especially useful in cities and corporate campuses where roof space may be limited. A high-quality solar canopy improves efficiency, requires little maintenance, and boosts the property's value.


Why Professionals Choose Corigy?

Trusted by industry experts, Corigy provides cutting-edge solar mounting systems. Their modern cantilever solar canopy models offer superior durability and sleek aesthetics. Designed for various site needs, they make it easy for professionals to scale solar projects without extra land or complexity.

From engineering to execution, Corigy helps clients get the most out of every square foot.


Future-Ready and Functional

A solar canopy is not just a trend—it's a long-term solution. As energy prices continue increasing together with an increased demand of sustainability, the system is characterized by a high ROI. Adoption is even cheaper because there are many government programs that ask tax credits or incentives.

By investing in a solar canopy, businesses not only save money but also show commitment to a cleaner future.

FAQs

Q1. What is the main purpose of a solar canopy?

A solar canopy is designed to generate solar energy while providing covered shelter, mainly in parking lots or open spaces.

Q2. How efficient are solar panel parking lots?

Solar panel parking lots are highly efficient, especially when placed in areas with high sun exposure. They provide dependable electricity besides enhancing utilization of space.

Q3. Can I install a solar canopy in an existing parking lot?

Yes. A solar canopy can be added over existing parking structures with minimal disruption to daily use.

Q4. Is maintenance required for a solar canopy?

It does not require a lot of maintenance. Systems are maintained at the highest levels of performance through occasional cleaning as well as periodic inspections.

Q5. What is the reason behind companies buying solar canopies?

They supply clean power, minimize the energy cost, protect vehicles, and brand the environment well.


HQ MOUNT On-Site in Norway | Pioneering Vertical Solar Solutions Where Geography Drives Innovation

We’re excited to share an exclusive update from our recent field visit to a cutting-edge vertical solar installation site in Norway! As a global provider of advanced solar mounting systems, HQMOUNT is proud to explore how Norway’s Arctic environment makes vertical solar a uniquely powerful solution.


Why Norway? The Vertical Advantage at High Latitudes

Norway’s geographic conditions — stretching up to 71°N latitude — present challenges that vertical solar technology turns into opportunities:


Low Sun Angle Optimization

Vertical-mounted panels are ideal for capturing the sun’s shallow trajectory in winter, ensuring optimal energy production even in low-light months.


Snow & Ice Resilience

Wall-mounted systems avoid snow burial and harness reflected light from snow-covered terrain.


24-Hour Summer Sun

Vertical panels mounting efficiently absorb extended horizontal light during Norway’s long dawns, dusks, and 24-hour sunlight periods.


Collaborating for Cold Climate Innovation

HQMOUNT is working closely with local Norwegian partners to deliver next-generation vertical solar systems designed specifically for extreme climates. These installations aim to transform walls into energy-generating assets, enabling sustainable power even in the world’s northernmost regions.


Together, we’re turning walls into energy assets!


CONTACT US---XIAMEN HQ MOUNT TECH CO.,LTD

Whatsapp : 18030160771

Tel : 86 05926252889

Email : allie@hqmount.com


#VerticalSolar #HQMOUNT #ArcticEnergy #CleanEnergyFuture #SolarMounting #NordicInnovation #NorwaySolar #CleanEnergyFuture #NordicSolar#RenewableTech

Solar Mounting Production in Full Swing at HQ Mount!

We’re proud to share a behind-the-scenes look at how HQ Mount powers solar energy projects worldwide with precision-engineered mounting solutions.  Check out our new HQ Mount 2025 video to see how SGS delivers precision-engineered solar mounting solutions:


Inside our production facility:
Round-the-clock production for solar power plants
Automated manufacturing of rooftop mounting accessories
Efficient loading for on-time delivery

From rooftop solar to large-scale PV farms, we deliver customized, reliable, and scalable mounting systems to meet your project needs.


Looking for a trusted solar mounting partner?
We combine engineering precision, production capacity, and responsive service to support global solar installers, distributors, and EPC contractors.

→ Explore SGS solutions: www.hqmount.com

#SolarEnergy #RenewableTech #SolarMounting #ManufacturingExcellence #HQMount #SolarSolutions #CleanEnergy #SolarMounting

Flat Roof Mounting System - Expert Guide

The technology is a flat roof mounting system that turns neglected rooftops into sources of clean energy power. Unlike pitched roofs, flat surfaces (typical of commercial/industrial buildings) require special engineered solutions to consider the issue of weight, drainage of water, and the force of the wind. This thorough guide will dive into the type of systems, installation procedures, waterproofing that is the best practice and the most important FAQs so that your solar project will be able to provide you with the optimal ROI without eating away at the integrity of the roof.

Why Choose Flat Roofs for Solar? The Strategic Edge

  • Structural Deck: All the loads are supported with concrete, steel or timber.
  • Vapor Barrier: It stops any inside moisture that could ruin insulation.
  • Insulation: The thermal insulation is conducted with rigid boards (PIR, EPS).
  • Waterproof Membrane: Asphalt (single-ply: EPDM, PVC), built-up: asphalt

Real-Life Effect: A Chicago School District reduced their energy bill by 60 percent and instead of spending money out of the budget in energy; they spent money on direct classroom resources.

Flat Roof Construction: The Hidden Engineering

Despite the name, flat roofs have a subtle 1°–5° pitch ("fall") for drainage. Core layers include:

  1. Structural Deck: Acts as a base to coral up all the loads which are concrete, steel or timber.
  2. Vapor Barrier: This stops the moisture inside the house deteriorating the insulation.
  3. Insulation: to control the temperature, use rigid boards (PIR, EPS).
  4. Waterproof Membrane: Built up asphalt or single-PLY (EPDM or PVC).

Failure Prevention Tip: Always verify membrane age/condition before mounting solar. Brittle or patched membranes risk leaks.

Flat Roof Mounting Systems: Types, Pros & Cons

Ballasted Systems: The Non-Penetrating Solution 

Applies a concrete block or paver as support to hold panels.

  • Advantages: No piercing of roofs, easy installations, suitability on roofs that leak.
  • Cons: Bulky (15 25 Kg/m 2), inappropriate in areas of high wind and also on edge roofs.
  • Best Use On: Warehouses, schools and EPDM/rubber roofs.

Mechanically Attached Systems: Maximum Stability 

It is fixed with bolts fixing through roof substructure.

  • Advantages: It is able to resist over 150+ mph winds, and requires little ballast, and permanent stability.
  • Cons: Needs membrane punctures (possibility of leaks, can not be sealed properly).
  • The Best Applications: Concrete decks, hurricane-prone areas and high-tilt applications.

Hybrid Systems: Balance of Strength & Simplicity

Combines ballast with limited strategic fasteners.

  • Advantages: saves 40 percent of the cost of ballast, and tolerates severe weather.
  • Disadvantages: cost more to install, tricky engineering.
  • Use Case: Places where a large quantity of snow may fall (e.g. Canada), or ocean-side locations where salt-corrosion may concern them.

Analogy: The shoe analogy is an expected solution to the mount selection: the ballasted slip-on shoes (easy version), the mechanical highway boots (secure version), the hybrids are the all-terrain sneakers (versatile version).

Installation: A Step-by-Step Blueprint

Phase 1: Roof Assessment

  • Load capacity analysis (dead + live + wind/snow loads).
  • Core sampling to check insulation/membrane integrity.
  • Drone mapping for optimal panel placement.

Phase 2: Mount Assembly & Positioning

  1. Ballasted: Place pads on protective underlayment, add frames, then ballast blocks.
  2. Mechanical: Flashing its boots, bolts rails onto sub structure, and applies sealant.
  3. Tilt Optimization: Panels are adjustable at 10 degrees to 15 degrees to get self cleaning rain runoff.

Phase 3: Panel Integration & Wiring

  • Clip panels to rails with grounding clamps.
  • Route conduit in cable trays above the membrane to avoid ponding water.

Waterproofing: Your Roof’s Lifeline

Solar mounts must integrate with waterproofing:


Method

How It Works

Best For

Flashing Kits

Metal collars + rubber gaskets seal bolts

Mechanically attached

Root Barriers

Puncture-resistant mats under ballast

Green roofs/EPDM

Drainage Layers

Corrugated mats directing water to drains

All systems (prevents pooling)


Important Protocol: Seal all the permutations before and after the installation of the bolts with 2-part liquid sealant such as polyurethane.

FAQs

Q: What type of mounting system is best for a flat concrete roof?

A: Mechanically attached systems are superior for concrete. Concrete’s compressive strength securely anchors bolts, while its mass counteracts wind uplift. Ballasted systems add deadweight unnecessarily (concrete roofs already handle 300+ kg/m²). For seismic zones, use flexible neoprene washers to absorb movement.

Q: How are flat roofs built to handle solar mounts?

A: Modern flat roofs are engineered "solar-ready" with:

  • Reinforced Decks: 150–200mm concrete or structural steel.
  • Protected Membranes: Root-resistant TPO/PVC layers.
  • Walk Pads: Designated maintenance paths to distribute worker weight.
Always retrofit older roofs with reinforcement mats before adding solar.

Q: How do you waterproof a flat roof under solar mounts?

A: A 3-layer defense:

  1. Primary Seal: Self-adhering butyl tape under mount feet.
  2. Secondary Seal: Silicone or urethane sealant around penetrations.
  3. Tertiary Drainage: Angled mounting feet create air gaps for water flow.
Moisture that is concealed is caught by infrared scans done annually.

Maintenance & Longevity: Protect Your Investment

  • Quarterly: Remove blockage of drains and under panels.
  • Biannual: Check sealant for cracks/reapply if needed.
  • Post-Extreme Weather: Inspect ballast displacement or loose bolts.
*Proactive care extends system life to 30+ years—matching solar panel warranties.*

Conclusion

A flat roof mounting system with the right design can maximize energy generation without detering the health of a roof. Choosing the proper type (ballasted, mechanical, or hybrid) of the ground mount ensuring waterproofing and following the structured installation, you will get a powerful asset that will generate income.Partner with engineers who understand both solar dynamics and roofing science—like Corigy’s certified team.


What is a Ground Mount Solar System?

Ground mounting solar systems provide industry professionals with a powerhouse alternative to rooftop installations for large-scale renewable energy. They choose to attach the panels to the earth with special supports rather than cramming them onto small rooftops.


This strategic ground mounting system approach unlocks game-changing advantages in scalability and efficiency. These benefits are most important for factories, agricultural businesses and power plants with extra land and are changing the way industries use energy.

Why Ground Mounting? Beyond the Rooftop Struggle

We've all faced rooftop solar's limitations – that awkward rooftop shape that won't accommodate more panels, persistent shading from nearby structures, or the headache of reinforcing aging roofs. That's where ground mounting systems shine. By positioning panels in open terrain at ideal angles, these systems consistently outperform their rooftop cousins. I've watched maintenance crews breathe easier during winter inspections when they can simply walk between rows rather than navigating rooftop safety harnesses.

Anatomy of an Industrial-Grade Ground Mount System

A high-performance installation relies on precision engineering:

  • Solar Panels : Industrial-grade PV modules built to withstand decades of exposure
  • Mounting Structures : The unsung heroes – engineered frameworks that transform steel into sun-tracking architecture. For demanding projects, we've seen success with solutions like Corigy's corrosion-resistant systems that stand up to coastal environments.
  • Foundations : Driven piles, concrete footings, or ballasted bases chosen based on local soil conditions.
  • Power Conversion : Inverters and transformers that silently convert DC to grid-ready AC.
  • Sun Trackers (Optional) : Clever mechanisms that tilt panels like sunflowers, boosting yields by 15-30% in optimal conditions.

Why Industrial Operators Are Making the Shift

Last quarter, I walked a 12 MW site with a plant manager who summarized it perfectly: "This land was just growing weeds before we put panels on it." His experience highlights why ground mounting solar systems are gaining traction:

  1. Scale Without Compromise : Need another 500kW? Just extend the array – no structural calculations required.
  2. Peak Performance : Optimized angles capture more morning and afternoon sun compared to roof-constrained layouts.
  3. Maintenance Made Human : Imagine cleaning panels without harnesses or lift equipment – it's transformative for operational budgets.
  4. Smart Land Use : That unused buffer zone or low-yield field becomes a revenue generator.
  5. No Rooftop Surprises : Avoid those heart-stopping moments when engineers question whether your roof can handle another kilogram.

Navigating Real-World Challenges

During a recent project in Punjab, we learned firsthand how monsoons impact foundation choices. Every site teaches something new:

  • Land Requirements : A 1MW system typically needs 4-5 acres – we always advise clients to walk the land with us before committing.
  • Regulatory Pathways : Agricultural land conversions require early community engagement – we've found transparent dialogue prevents delays.
  • Grid Integration : That substation down the road? Its capacity will make or break your timeline.
  • Security Solutions : In remote locations, we've integrated motion-sensing cameras directly into the mounting structures.

Ground Mount vs. Rooftop: Choosing Your Champion

Let's be honest – both solutions have their place. From our field experience, ground mounting systems pull ahead when you need serious scale (think 500kW+) or have challenging rooftops. They're like building a dedicated power factory versus retrofitting an existing structure. That said, we recently helped a Mumbai warehouse where rooftop solar was perfect for their 200kW needs. The sweet spot? Ground mounts when land is available and output is critical; rooftops when space is constrained and smaller-scale makes sense.


From Blueprint to Power Generation: The Installation Journey

Remember that solar farm we commissioned near Chennai last monsoon? The timeline looked like this:

  1. Land Dating (2-4 weeks) : Our geotech team became best friends with soil samples while meteorologists analyzed 20 years of sunlight data.
  2. Design Dance (6 weeks) : Engineers tweaked layouts daily – shifting rows to avoid that one problematic drainage area.
  3. Material Symphony : We sourced marine-grade aluminum structures knowing coastal air would devour anything less.
  4. Construction Choreography : Watching crews install pre-assembled trackers felt like witnessing synchronized swimming with steel.
  5. Grid Handshake (The Final Hurdle) : Celebrated when the utility's meter finally nodded approval.

Cost Realities: Investing Wisely

Breaking down a recent 3MW project revealed some truths: panels consumed 55% of the hardware budget, but the structural system was the silent MVP. Cutting corners on mounting hardware is like building a mansion on weak foundations – eventually, you'll pay more. We've seen quality ground mounting systems actually reduce long-term costs when hailstorms hit or when maintenance crews save hours accessing components. That reliable mounting platform from Corigy we mentioned earlier? It paid for itself in reduced crane time during installation.

Transforming Land into Power Infrastructure

That client with the "weed-filled land"? His 8-acre plot now powers his entire bottling plant with 30% surplus. More importantly, he sleeps better knowing energy costs are fixed for decades. That's the real magic of ground mounting solar systems – they turn underutilized assets into predictable power generators.

Conclusion: Powering Industry with Earth-Anchored Solar

Ground mounting solar systems by Corigy offer industrial users unparalleled control over scale, performance, and operational ease. By decoupling energy production from building constraints, they unlock higher returns and predictable clean power—transforming open land into strategic infrastructure. As solar costs decline and grid demands evolve, these systems are becoming indispensable for forward-thinking enterprises committed to resilience and sustainability.

Straight Talk: Ground Mount Solar FAQs

Q: Are ground-mounted solar panels better? A: "Better" depends on your goals. If maximum output and scalability are priorities, ground mounting systems consistently outperform rooftops. They're like comparing a dedicated factory to a home workshop – both useful, but engineered for different scales. The catch? You'll need available land.

Q: What's the biggest ticket item in solar installation? A: Panels typically consume the largest hardware slice (50-60% of equipment costs). But here's what many miss: your ground mounting system is the foundation protecting that investment. We've seen too many projects regret underspending here when maintenance costs balloon later.

Q: How much land for a 1 MW solar plant? A: For fixed-tilt systems, budget 4-5 acres (1.6-2 hectares). But let me share a recent lesson: a client squeezed 1.2MW into 5 acres using higher-efficiency panels and smart row spacing. Always consult engineers before assuming land requirements.


Balcony Solar Mount Maximize Energy with a Smart Installation

Imagine that you're sipping coffee on your balcony while an invisible power station silently offsets your electricity bill. No yard, no roof access, no problem. This isn't sci-fi—it's the reality of modern balcony solar mount technology. For millions in apartments, condos, and urban homes, these ingenious systems are rewriting the rules of energy independence. Let's explore how you can tap into this revolution.

balcony solar mount

Why Your Balcony is a Secret Solar Powerhouse

Forget sprawling backyards. Balconies are the unsung heroes of urban solar:

  • Space Genius: Transform 10 sq ft into an energy generator.
  • Plug-&-Play Magic: Most systems connect like appliances—no electrician needed.
  • Instant ROI: Slash 10-30% off your electricity bill immediately.
  • Eco-Warrior Status: A single 600W reduces setup CO2 by ~1 ton annually—equivalent to planting 23 trees.

*"My landlord said 'no' to roof panels but didn't blink at my balcony setup. Now I save $45/month!" – Raj T., Toronto*

How Balcony Solar Mounts Actually Work

Unlike clunky rooftop rigs, a balcony solar mount system uses sleek, aerodynamic frames that clamp onto railings or bolt discreetly to walls. Solar panels feed power through a "plug-in solar device" (micro-inverter) directly into any outdoor outlet. The best part? Most regions waive permits for systems under 800W—though always verify local rules!

7 Benefits That'll Make You Rethink Your Balcony

  1. Rooftop? Not Required: High-rises, rented spaces, or historical homes—your balcony qualifies.
  2. Move-Friendly Power: Relocating? Unplug and take your investment with you.
  3. DIY Delight: Install most kits in <2 hours with basic tools (wrench, screwdriver).
  4. Storm-Proof Security: Modern mounts withstand 80+ mph winds when properly installed.
  5. Hidden Inflation Shield: Lock in energy costs as utility rates climb.
  6. Community Catalyst: Your often setup inspires neighbors (like Maria's Barcelona building with 27 solar balconies!).
  7. Stealth Aesthetics: Low-profile designs blend seamlessly with urban landscapes.

Your Pre-Installation Checklist: 5 Non-Negotiables

1. Structural Safety Scan:

  • Concrete balconies = ideal.
  • Wooden railings? Reinforce with horizontal braces.
  • Avoid cantilevered balconies without engineer approval.

2. Sunlight Forensics:

  • Use a free app like Sun Surveyor for 3-day light mapping.
  • South/West-facing? Gold standard. North-facing? Not hopeless—special mounts can optimize.
  • Watch for "solar thieves": AC units, seasonal shadows from buildings.

3. Regulatory Radar:

  • HOAs: Frame it as a "temporary balcony appliance."
  • Landlords: Highlight UL-certified safety and reversibility.
  • Utilities: Some require notification (rarely permits) for grid-tied systems.

4. Gear Quality Audit:

  • Avoid flimsy mounts: They risk panels becoming airborne debris.
  • Seek aircraft-grade aluminum frames with anti-corrosion coating.
  • Ensure IEC 61215 certification for panels and UL 1741 for inverters.

5. Future-Proofing:

  • Leave room for 1-2 extra panels.
  • Choose adjustable-angle mounts for seasonal optimization.

The Installation Lowdown: Simpler Than Assembling IKEA Furniture

Modern balcony solar mount kits prioritize user experience:

Step 1: Secure the Frame

  • Railing mounts: Tension clamps grip without drilling (perfect for renters!).
  • Wall mounts: Use corrosion-proof anchors for permanent setups.

Step 2: Panel Attachment

  • Slide panels into channels—tool-free systems exist!
  • Angle at 30°-40° (ideal for snow shedding and winter sun).

Step 3: Plug & Profit

  • Connect the micro-inverter to the outdoor outlet.
  • Download a monitoring app to track real-time savings.

Pro Tip: Cloudy climate? Opt for monocrystalline panels—they outperform in low light.

balcony solar mounting kit

Why Mount Quality is Your Silent Check

A cheap balcony solar mount risks thousands in damage. A premium mount? It's the invisible workhorse ensuring:

  • Safety: Certified wind/load ratings prevent disasters.
  • Longevity: Rust-proof materials survive coastal air and snow.
  • Efficiency: Precision angles boost energy harvest by 15-25%.

After stress-testing 12+ systems, I consistently recommend the Corigy Balcony Mounting Kit . Its German-engineered tension clamps and tool-free tilt adjustments solve 90% of urban solar headaches—making it a top choice for hassle-free energy harvesting.

Beyond Savings: The Ripple Effect You Create

When you install a balcony solar mount, you join a global movement:

  • Policy Change: Berlin now subsidizes balcony solar. Your adoption fuels local advocacy.
  • Grid Relief: Distributed solar reduces neighborhood blackout risks during heatwaves.
  • Value Boost: Studies show solar-equipped rentals command 3.5% higher prices.

Busting 4 Persistent Solar Myths

Myth 1: "Balcony systems don't generate meaningful power." Reality: A 600W setup (2-3 panels) powers refrigerators + laptops + LED lighting daily.


Myth 2: "Winter production tanks to zero." Reality: Snow reflects light! Panels often over perform in cold, sunny conditions.


Myth 3: "Installation requires an electrician." Reality: UL-certified plug-in systems are DIY-safe (always follow manuals!).


Myth 4: "Panels damage railings." Reality: Proper mounts distribute weight evenly—often <5 lbs per clamp.

Maintenance Made Mindless

  • Monthly: Wipe panels with 1:3 vinegar-water solution (5 mins max).
  • Seasonally: Adjust tilt—steeper in winter, flatter in summer.
  • Annually: Check bolt tightness and corrosion points.

Your Action Plan: From Dream to Kilowatts

  1. Calculate Needs: Track your kWh usage (check utility bills).
  2. Start Small: A single 300W panel kit tests viability.
  3. Gear Up: Prioritize mounts with >10-year warranties.
  4. Install Smart: Morning = best time for shadow-free setup.

"I started with one panel. Within a year, my whole building had them. Management even installed communal charging ports!" – Diego M., Mexico City

image of balcony solar mount

The Future is Balcony-Bright

Innovations are accelerating:

  • Integrated Solar Railings: Panels built into balcony structures (2025 launch).
  • AI Optimizers: Auto-tilting mounts that track sun via smartphone.
  • Community Virtual Plants: Pool balcony-generated credits with neighbors.

Conclusion

Let's be real: the energy revolution isn't just happening on sprawling suburban rooftops anymore. It's unfolding quietly on city balconies, high-rise terraces, and rented patios—anywhere someone dares to reimagine "home" as something more resilient. A balcony solar mount isn't just hardware; it's a key to energy democracy.

Think about what you've gained by considering this:

  • Freedom from Limits: No yard? Renting? Your balcony is now a viable power source.
  • Tangible Control: Slash bills now while hedging against future rate hikes.
  • Quiet Impact: That humble panel outside your window? It's actively shrinking your carbon footprint with every sunset.

How to install Solar Panel Mounting Brackets?

Getting solar panel mounting brackets right isn't glamorous work, but it's the most important part of your solar project. Get this wrong and you could end up with a rooftop breakdown, wobbly panels or worst still a leakage. This guide correctly peels off all the complications and provides you a clear realistic step-by-step path whether you are installing it on a suburban roof or on a business site.

Why Bracket Installation Can't Be Rushed

Imagine your solar array as a tree. The panels are the leaves, the rails are the branches—but the solar panel mounting brackets are the roots. If they're weak, the whole system fails. Here's why pros never cut corners:

  • Leak-free : improper seal of holes in roofs is an open invitation to water damages.
  • The lifetime of brackets : low-end brackets rust; high-end ones last between 25 years and above.
  • Efficiency : Unbalanced brackets will create an imbalanced tension in the panels reducing the amount of energy created.

Pro Tip : For tricky roofs (like tile or metal), skip “universal” brackets. Use specialized kits (like Corigy ’s tile hooks) to prevent cracks and leaks.

Your Toolkit: What You Really Need

Don't start without these:

  • Brackets & Rails : Must match your roof type (shingle/tile/metal/flat).
  • Lag Bolts : Stainless steel only—no substitutions! Torque
  • Wrench : The hero of this story. Guessing = failing.
  • Laser Level & Tape : Precision is non-negotiable.
  • Roof Sealant : Butyl tape or polyurethane. Waterproof every penetration.
  • Stud Finder: Rafter detection saves disasters. glasses. Never skip this.

Pre-Installation: Your Secret Weapon

1. Roof Health Check:

  • Inspect for rot, soft spots, or old leaks. Fix before drilling.
  • Verify load capacity (get an engineer's report for older buildings).

2. Smart Layout Planning:

  • Mark rafter centers with chalk lines.
  • Avoid vents, pipes, and weak zones.
  • Space solar panel mounting brackets 4-6 feet apart (follow rail specs).

3. Material Audit:

  • Check grades of confirm bolt and bracket load rating.
  • Look at corrosion-defeating lays (anodized aluminum takes the prize).

Installation: Simple Steps for Perfect Brackets

Step 1: Marking & Leveling

  • Find rafters : Use your stud finder, mark centers clearly.
  • Snap chalk lines : Follow rafter paths exactly.
  • Bracket spacing : Mark positions every 4-6 feet along lines.
  • Laser-check : Ensure <1/8” deviation over 20 ft. Crooked rails ruin everything.

Step 2: Securing Brackets

  • Seal holes: Apply sealant where bolts penetrate.
  • Drill pilot holes: Center on rafters—use the right bit size!
  • Bolt brackets: Hand-tighten lag bolts first.
  • Torque down: Crank to 35-55 ft-lbs (check manufacturer specs!).

Critical: Missing the rafter reduces strength by 80%. Double-check with a stud finder!

Step 3: Attaching Rails

  • Slide rails into bracket channels.
  • Secure at every bracket with set screws.
  • Verify rails are parallel (±2 mm tolerance).

Step 4: Mounting Panels

  1. Lift panels with suction handles (2-person job!).
  2. Clamp frames to rails:
    - End clamps for panel edges.
    - Mid clamps between panels.
  3. Torque clamps to 15-20 ft-lbs.
  4. Leave ¼” gaps between panels for heat expansion.

5 Mistakes That Destroy Mounting Systems

  1. Drilling Blind : Hitting sheathing, not rafters. Always verify with a stud finder.
  2. Ignoring Torque : Under-tightened bolts shake loose; over-tightened one's strip. Your torque wrench is sacred.
  3. Skipping Sealant : 1 hole which is not sealed = a future leak. Seal the way your check is phoned in.
  4. Intermixing of Metals : when the steel bolts are used with an aluminum bracket it leads to corrosion. Apply incompatible metals or dielectric washers.
  5. Forgetting Gaps : Zero expansion space cracks panels. Keep that ¼” buffer!

Maintaining Your Brackets for Decades

  1. Bi-Annual Inspections : - Check for cracks/rust on brackets.
    - Re-torque critical bolts.
    - Reseal any cracked sealant.
  2. After Storms : Scan for shifted panels or debris buildup.
  3. Debris Control : Keep brackets clear of leaves/pine needles.

Why Quality Brackets Pay for Themselves

Solar panel mounting brackets are the unsung heroes of your solar investment. Cutting corners here risks:

  • Costly rework ($1,500+ per leak repair)
  • Reduced panel lifespan
  • Voided warranties

Buy brackets that are UL-listed and corrosion-resistant that will fit your type of roof. Tile, slate or difficult metal roofs: consider engineered solutions such as tinker-specific kits like Corigy - With engineered kits like Corigy , 90 percent of the typical failures are avoided.


The bottom line, accuracy + high quality materials = 25 years of trouble free energy.

Wrapping Up: Secure Your Solar Investment

Nailing the installation of solar panel mounting brackets isn't just about bolts and rails—it's about peace of mind. In the event that brackets are mounted straight, waterproofed, and tightened precisely, your solar set-up endures blizzards, zeroes leaks, and provides clean energy during years to come. Shortcuts point to expensive repair, life jeopardized and energy wastage. In the case of tricky roofs such as tile or metal, use the special solutions of Corigy in order to achieve a weatherproof fit as strong as a rock. Reminder: top-quality brackets and professional accuracy only make a solar project good, then superb. Plant one time; reap forever.

FAQs: Solar Panel Mounting Brackets

Q: How do brackets attach to solar panels? A: They don't! Brackets bolt to roof rafters, rails snap onto brackets, and panels clamp onto rails. Brackets anchor the system; clamps hold panels.
Q: How many brackets per panel? A: Always 4 (2 top, 2 bottom). Spacing depends on local snow/wind loads—usually 4-6 ft apart. Never exceed engineering specs.

Q: Best mounting method? A: Depends on your roof:

  • Pitched roofs : Low-profile solar panel mounting brackets (minimal wind lift).
  • Flat roofs : Ballasted systems or penetration kits.
  • Ground mounts : Ideal for weak/shaded roofs.